
The right bag-logo method depends on the complete application: artwork, fabric, coating, colour, surface shape, placement, expected use, care, quantity and approval criteria. A process name alone does not establish appearance, durability, price or production timing.
Direct answer: Choose screen printing for artwork that can be separated into controlled print layers on a suitable surface; consider heat transfer for detailed or multicolour graphics when the panel tolerates the required heat and pressure; consider embroidery when a raised thread finish suits the design and the panel can support the stitch density. Always validate the chosen method on the representative bag material and construction before production approval.
Quick comparison
| Decision factor | Screen printing | Heat transfer | Embroidery |
|---|---|---|---|
| How the design is applied | Ink passes through a prepared mesh stencil | A prepared graphic is bonded or transferred with controlled heat and pressure | Thread is stitched through the panel using digitized stitch instructions |
| Visual character | Printed ink layer; appearance depends on ink and substrate | Can support detailed, multicolour or tonal graphics depending on the transfer system | Raised textile texture with visible thread and stitch direction |
| Artwork preparation | Colour separation, printable detail, screen setup and registration | Transfer-ready artwork, colour handling, cut/print method and edge treatment | Digitizing, stitch type, density, sequence and thread selection |
| Substrate questions | Texture, colour, absorbency, coating and ink compatibility | Heat/pressure tolerance, coating, texture, stretch and bonding compatibility | Panel strength, stretch, thickness, backing and needle penetration |
| Placement constraints | Screen and squeegee access; flat support improves consistency | Platen and press access; seams and thickness affect pressure | Hoop/frame access; pockets, seams, padding and hardware can interfere |
| Multi-colour effect | Usually separate screen and registration for each spot colour | Often practical for complex or multicolour graphics, depending on the system | Multiple thread colours; complexity also depends on stitch sequence and density |
| Surface feel | Varies with ink deposit and fabric | Varies by transfer film, ink and coverage | Raised and tactile |
| Approval focus | Colour, registration, coverage, edges, curing and adhesion | Colour, edge, bonding, surface change, heat marks and flexibility | Thread colour, stitch coverage, distortion, backing and reverse-side condition |
This table describes common planning differences, not guaranteed capabilities. The selected supplier process, material and sample control the result.
1. Screen printing
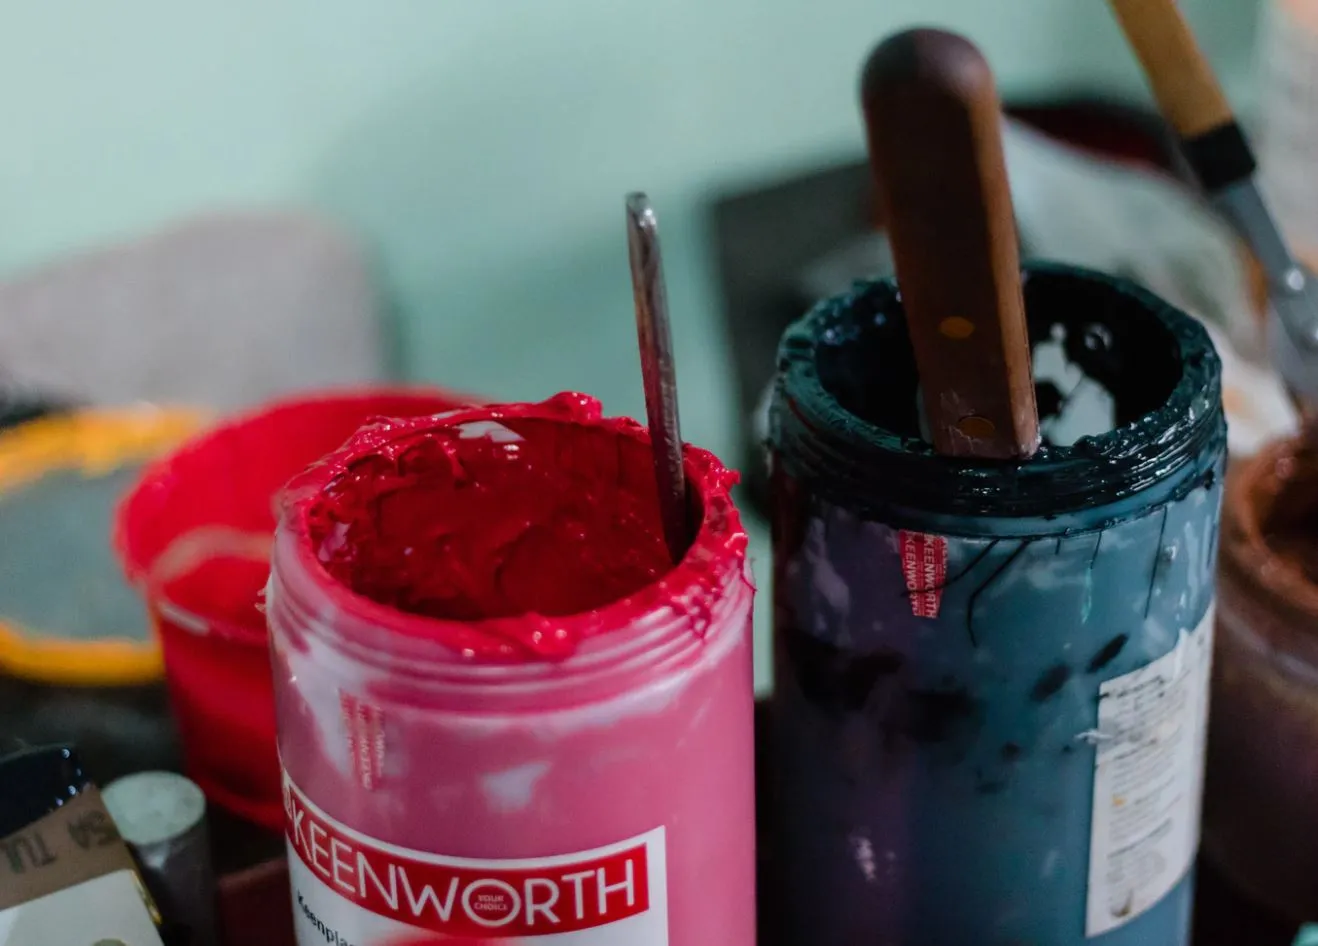
Screen printing pushes ink through open areas of a prepared mesh stencil. Each spot colour normally has its own artwork separation and screen. It can suit bold graphics, text and controlled colour areas when the substrate provides an appropriate printable surface.
Review:
- number of colours and registration between them;
- line, gap, text and halftone detail;
- fabric texture, colour, coating and absorbency;
- ink system, opacity and desired surface feel;
- whether an underbase is proposed;
- flat access and support during printing;
- drying or curing compatibility;
- measurable placement relative to the finished bag.
Multi-colour work is possible, but each added separation can affect setup, registration and commercial assumptions. Read what screen printing is and how it is controlled for the full process.
2. Heat transfer
“Heat transfer” is a broad description, not one universal material or process. A prepared image, film, ink layer or other transfer system is applied using controlled heat, pressure and time.
It may be considered for:
- detailed or multi-colour artwork;
- gradients or tonal effects supported by the selected system;
- names, numbers or controlled variable elements;
- short or segmented programmes where the chosen process is commercially appropriate;
- surfaces where print-layer preparation is less suitable but heat transfer has been validated.
The bag panel must tolerate the process. Heat and pressure can affect coatings, foam, surface gloss, colour, texture, adhesives or dimensional stability. Curved, padded or seamed areas can create uneven contact.
Confirm the exact transfer system, not just the phrase “heat transfer,” because materials, appearance, hand feel, application and care can differ.
3. Embroidery
Embroidery converts artwork into digitized stitch instructions and builds the mark with thread. It produces a raised textile finish and may suit logos designed for clear stitched shapes.
Review:
- artwork simplification and minimum practical detail;
- stitch type, direction, density and sequence;
- thread colour and sheen;
- panel thickness, stretch and stability;
- backing or support needs;
- hoop or frame access;
- needle effects on coatings or barrier layers;
- panel distortion, puckering and reverse-side appearance;
- proximity to seams, pockets, zippers, foam and hardware.
Dense or large embroidery can add weight and stiffness. Lightweight, stretchy or highly coated panels may require design or construction adjustment.
Match the method to the artwork
| Artwork characteristic | Screen-print question | Heat-transfer question | Embroidery question |
|---|---|---|---|
| One or several solid colours | Can each colour be separated and registered? | Does transfer add unnecessary film or process complexity? | Can shapes be digitized cleanly with suitable thread coverage? |
| Fine text or thin lines | Will mesh, ink and fabric texture hold the detail? | Can the selected system reproduce and retain the detail? | Will letters and gaps remain legible after digitizing and stitching? |
| Gradient or photograph | Is an approved halftone approach appropriate? | Does the chosen system support the tonal range and substrate? | Should the artwork be simplified rather than translated literally? |
| Large solid area | Is ink coverage and hand feel acceptable? | Will a large transfer affect feel, flexibility or bonding? | Will stitch density, weight and panel distortion become excessive? |
| Metallic, reflective or special effect | Is a compatible specialty ink available and validated? | Is an appropriate special-effect transfer available and validated? | Does a suitable thread exist and meet appearance/use needs? |
When the original artwork is not suitable, revise it deliberately and obtain buyer approval. Do not allow the production method to silently change a protected logo.
Match the method to the material
A material name is only a starting point. Review fibre, construction, weight, texture, stretch, coating, surface treatment, colour, foam and reinforcement.
- Cotton or canvas directions: texture and absorbency affect print edges and ink deposit; embroidery support depends on weight and weave; heat response still needs validation.
- Polyester or nylon directions: coating, dye behaviour, heat sensitivity and ink or transfer compatibility vary by actual material.
- Non-woven directions: basis weight, surface and heat tolerance can limit fine printing, transfer or dense stitching.
- Mesh: open structure affects print coverage, transfer support and embroidery stability.
- Stretch or neoprene-like structures: deformation, recovery, heat and needle penetration need representative trials.
- Coated or laminated panels: every method can interact with the finish; do not assume decoration preserves waterproofness or barrier performance.
If the decoration method changes, review whether the underlying material specification or construction also needs to change.
Decide placement before the pattern is frozen
Logo position affects both appearance and manufacturability. Review it against:
- visible area after filling or wearing;
- panel cut line and finished seam line;
- folds, gussets and bindings;
- pockets and zipper tracks;
- foam, reinforcement and internal dividers;
- handles, webbing and hardware;
- screen, press or embroidery-frame access;
- distortion during sewing and final assembly.
Applying decoration to a flat cut panel often offers better access. Post-assembly decoration may be possible on a clear, supportable surface, but should be confirmed before the sample is approved.
Define print or embroidery size and placement from named datums. “Centered” should specify which panel, visible area or finished reference controls the measurement.
Compare colour and texture physically
Digital files, paper references, ink, transfer material and embroidery thread reflect colour differently. Fabric colour, texture, coating, underbase, ink deposit, transfer film, thread sheen, stitch direction and lighting can change appearance.
Approve:
- named colour references;
- actual production-direction substrate;
- physical decoration sample or strike-off;
- viewing condition or instrumental method where required;
- acceptable visual and measurable variation;
- final texture, gloss, relief and hand feel.
Photographs are useful for discussion but should not be the only colour standard when colour accuracy is important.
Do not rank durability by method name
Any of the three methods can fail if its materials or process do not suit the bag.
| Method | Possible observations | Variables to investigate |
|---|---|---|
| Screen printing | Poor adhesion, cracking, pinholes, smudging, misregistration or uneven opacity | Ink/substrate compatibility, screen, surface condition, film deposit, curing and expected strain |
| Heat transfer | Edge lift, incomplete bonding, cracking, wrinkling, heat mark or surface change | Transfer system, temperature, time, pressure, substrate, coating, shape and cooling |
| Embroidery | Puckering, loose or broken thread, gaps, distortion, damaged coating or backing visibility | Digitizing, density, tension, needle/thread, backing, hooping, panel construction and stitch path |
Define expected use, abrasion, flexing, washing or cleaning, weather exposure and other relevant conditions. Then agree on representative samples, methods and acceptance criteria. Avoid claims such as “permanent,” “washproof” or “most durable” without a defined basis.
Include care requirements in method selection
The intended cleaning method can affect ink, transfer, thread, backing, fabric and coating. Do not finalize a care label from the base fabric alone.
Before approval:
- define the proposed cleaning and drying instructions;
- test the complete decorated material or representative bag;
- inspect colour, adhesion, cracking, edge lift, thread, puckering and surface change;
- record prohibited cleaning methods;
- reassess when material, colour, ink, transfer, thread or process changes.
Link decoration approval to the controlled care specification. Review the backpack cleaning and care framework for a label-led approach that can be adapted to the actual product.
Sample and approval sequence
- Confirm buyer rights to use the artwork and trademarks.
- Freeze the artwork version, size, colour references and placement.
- Confirm the bag material, colour, coating and panel construction.
- Select one or more feasible decoration methods for trial.
- Prepare a representative strike-off, transfer sample or embroidery sew-out.
- Review physical colour, detail, texture, registration, placement and panel effect.
- Complete agreed adhesion, flex, care or other project tests.
- Record corrections and approve a named sample/specification revision.
- Control production changes and repeat-order references.
Approval of artwork alone is not approval of the physical decoration.
Commercial comparison without false assumptions
Setup and unit cost can move differently as quantity changes, but no method is automatically cheapest.
Ask each quotation to state:
- included artwork preparation, screens, transfers, digitizing or setup;
- colour count or stitch assumptions;
- logo dimensions and placement;
- material and panel assumptions;
- sampling and approval stages;
- tests and inspections included;
- quantity by design, colour and variant;
- packaging and handling implications;
- change, rework and repeat-order conditions;
- quotation validity and timing dependencies.
Compare the same specification and approval scope. A low decoration price is not comparable if it excludes setup, sample, testing or material preparation included elsewhere.
Decision workflow
Use these questions in order:
- What exact artwork and visual result must be preserved?
- What is the selected fabric, coating, colour and panel construction?
- Is the placement flat and accessible at the planned production stage?
- Which methods are technically feasible without harming the substrate?
- Which physical texture and reverse-side condition are acceptable?
- Which use, care and performance requirements need validation?
- What setup, quantity, variant, timing and commercial constraints apply?
- Which representative sample and criteria will control approval?
If two methods remain feasible, sample both on the same production-direction material rather than deciding from generic photos.
RFQ checklist for custom bag branding
Send Benshine:
- controlled bag specification or product brief;
- editable artwork and confirmation of usage rights;
- intended logo dimensions, colours and location;
- selected fabric, colour, coating and panel structure;
- required visual texture, gloss and relief;
- expected use, exposure and care method;
- proposed screen print, heat transfer, embroidery or open comparison;
- sampling, testing and approval requirements;
- quantity by artwork, colour and variant;
- packaging, destination and delivery information.
Benshine can review feasible branding directions for the controlled project. Method availability, achievable detail, colour match, adhesion, care, performance, MOQ, price and timing require confirmation against the final artwork, material, construction and order scope.
Continue your decoration planning
- Learn how screen printing works on custom bags
- Browse promotional bag formats
- Review tote bag references
- See the custom bag manufacturing workflow
- Plan order-specific quality controls
- Send Benshine artwork and a controlled bag brief
Quick answers
Which is better for bags: screen printing, heat transfer or embroidery?
There is no universal winner. Screen printing often suits controlled spot-colour artwork on a printable surface, heat transfer may suit detailed or multicolour graphics on a heat-compatible panel, and embroidery creates a raised thread finish. The final choice depends on artwork, substrate, placement, appearance, quantity and validated performance.
Which bag logo method is most durable?
Durability cannot be ranked from the process name alone. Ink or transfer system, thread, fabric, coating, preparation, application, curing, stitch construction, use and care all matter. Define the expected exposure and test a representative finished sample.
Which logo method is cheapest for custom bags?
Cost depends on setup, colour or stitch complexity, artwork size, material, placement, quantity, sampling, testing and production conditions. Compare quotations only after the same controlled artwork, bag specification and approval scope are supplied.
Can a logo be applied after the bag is sewn?
Sometimes, but seams, pockets, padding, zippers, handles and limited equipment access can restrict placement and consistency. Applying decoration to a flat cut panel is often easier, so the sequence should be decided before pattern and sample approval.
Should logo approval use the final production fabric?
A representative production fabric, colour, coating and panel construction are preferable because texture, absorption, heat response, stretch and support can change the result. Approve the decoration together with its material and placement.
Can Benshine reproduce another company's logo or branded design?
The buyer must have appropriate rights and authorization for every supplied trademark, artwork and protected element. Benshine does not offer counterfeit or unauthorized branded production.