
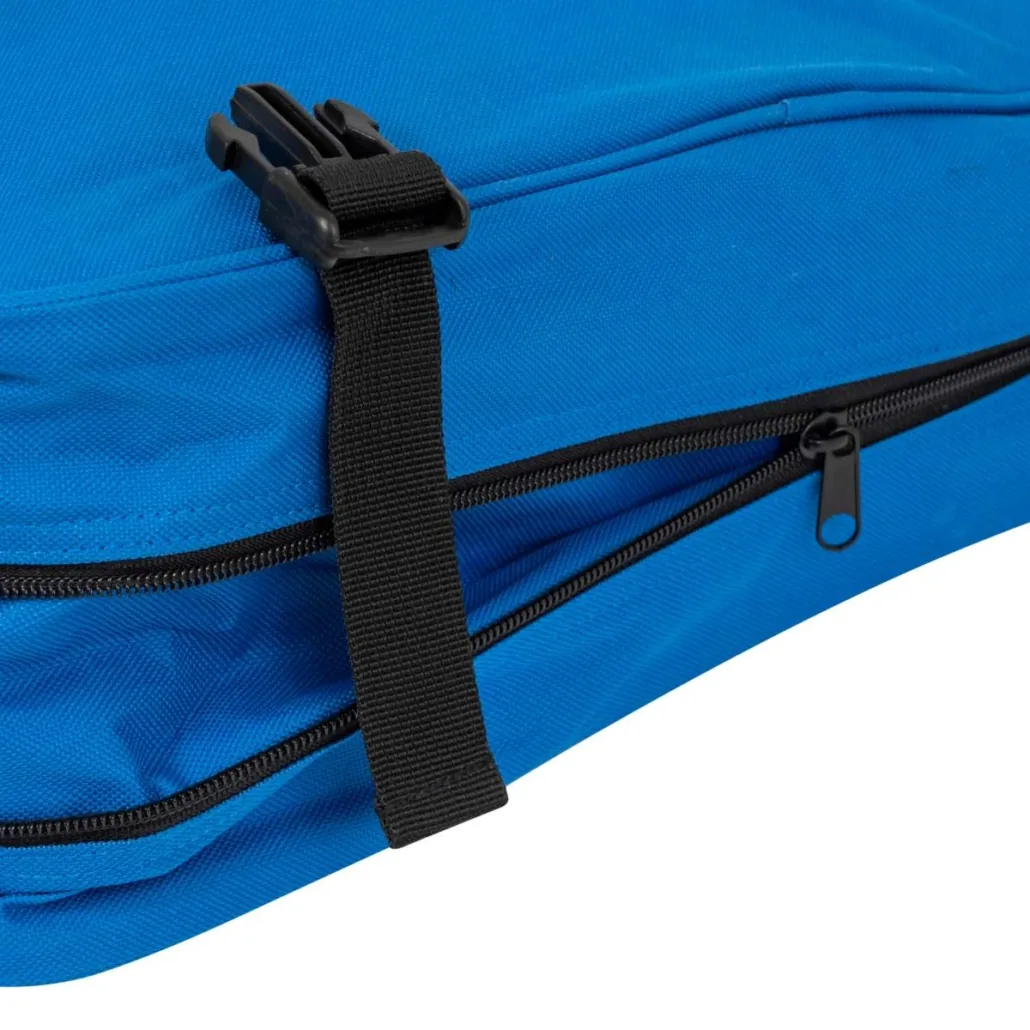
Bag components control access, adjustment, carrying and attachment. A useful specification identifies more than “black zipper,” “plastic buckle” or “metal hook”: it links the exact component to its mating parts, installation geometry, user interaction, environment and approval evidence.
Direct answer: Specify every zipper, buckle, adjuster, webbing, hook and ring by function, dimensions, material direction, colour or finish, orientation, supplier or approved reference where required, and the way it attaches to the bag. Confirm that mating parts fit and operate together, then validate the installed assembly. A stronger-looking component cannot compensate for unsuitable webbing, a weak anchor, poor zipper geometry or an uncontrolled substitution.
Build a component system, not a shopping list
| System | Connected parts | Questions to control |
|---|---|---|
| Zipper opening | Chain, tape, slider, puller, stops, panels, flap | Clear access, curve, direction, ends, sewing and exposure |
| Adjustable strap | Webbing, adjuster, ring or hook, anchors | Width/thickness fit, slip, range, routing, load path |
| Side-release closure | Male/female buckle, webbing, seam anchors | Mating code, orientation, operation, release and attachment |
| Detachable strap | Hook, ring, webbing, pad, adjuster | Gate clearance, rotation, finish, length and loaded geometry |
| Drawcord closure | Cord, channel, cord lock, end | Diameter fit, travel, retention, user and safety requirements |
| Mechanical fastener | Snap, rivet, eyelet or magnet plus backing | Hole size, mating set, reinforcement, finish and installation |
Component performance and bag performance are not the same. The installed system includes the surrounding fabric, reinforcement and seam construction.
What belongs in the bill of materials?
For each component, record as applicable:
- part name and stable item code;
- intended function and installation location;
- supplier or approved reference when controlled;
- component family, construction and nominal size direction;
- measured critical dimensions;
- material or composition direction;
- colour and surface finish reference;
- mating component and compatibility;
- left/right, face/reverse or operating orientation;
- cut length, quantity and unit;
- logo or custom-mould requirement and authorization;
- required documents, tests and approval sample;
- substitution and change-control rule.
Photographs help identify appearance, but perspective and lighting do not control dimensions, material, finish or mechanism.
Zipper anatomy
A bag zipper can include:
- chain or elements: the coil, moulded elements or teeth that engage;
- zipper tape: textile strips carrying the elements and sewn to the bag;
- slider: the moving mechanism that joins or separates the elements;
- puller or pull tab: the part the user grips;
- top and bottom stops: features limiting slider travel;
- retainer box and insertion pin: parts used on selected separating zippers;
- end tabs: fabric or other pieces finishing zipper ends;
- garage: a small cover or recess for the parked slider;
- flap: material shielding or visually covering the zipper area.
Use these terms with a cross-section or approved sample when the opening is complex.
Zipper construction directions
| Zipper direction | General characteristics to consider | What it does not prove |
|---|---|---|
| Coil zipper | Flexible chain direction often used around curves | Strength, durability or water performance |
| Moulded-element zipper | Individual formed elements and a more defined profile | Load rating, environmental suitability or longevity |
| Metal-element zipper | Metal teeth direction with a distinctive appearance | Corrosion resistance, strength or universal suitability |
| Reverse-coil zipper | Coil orientation places a smoother tape face outward | Waterproofness or coating performance |
| Coated or laminated-face direction | Added surface layer over part of the zipper area | Finished-product waterproofness or flex durability |
| Separating zipper | Two sides can disengage completely | Suitability for a given bag opening or load |
Select based on the opening geometry, user interaction, material stack, visual brief, exposure and required evidence—not a universal quality ranking.
Zipper size and compatibility
Nominal zipper size is a useful sourcing direction but should not be treated as a universal measured standard across every supplier and construction. Slider, chain, stops and other parts must be compatible.
Control:
- approved supplier and component family when interchangeability matters;
- actual chain width or other critical dimensions if needed;
- slider type and quantity;
- tape width available for seam allowance and sewing;
- colour match between tape, elements, slider and puller;
- sample identity and revision;
- replacement or substitution approval.
A slider that appears to fit a chain may still operate inconsistently if it is not the correct mating component.
Slider and puller decisions
Sliders may be locking, non-locking or otherwise configured for the intended opening. The selected behaviour should be confirmed physically rather than assumed from appearance.
Define:
- one-way or two-way opening;
- slider parking position when closed;
- pull direction and hand access;
- puller length, shape, material and branding;
- glove-use or accessibility needs where relevant;
- clearance from flaps, piping and corners;
- noise, snagging or contact concerns;
- acceptable finish and movement on the installed zipper.
A decorative cord or moulded pull extension also needs attachment and retention control.
Opening length, chain length and clear access
These measurements may differ:
- overall zipper chain length;
- sewn opening length;
- slider travel;
- clear usable opening after stops, end tabs and curves;
- the space available to insert the intended item.
Specify how each is measured. For laptop sleeves, equipment bags, medical organizers or tool kits, validate access with the actual item or controlled mock-up.
Curves influence slider effort, tape feeding and panel shape. Tight radii, thick piping and uneven layer stacks can interfere with smooth operation even when the zipper is acceptable on a flat strip.
Zipper ends and installation
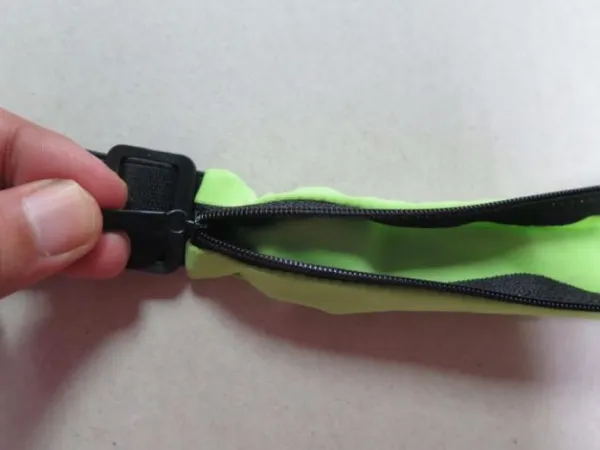
Zipper failure or poor appearance often begins near ends and transitions. Review:
- top and bottom stops;
- end tabs or folded tape treatment;
- whether slider travel reaches a tight corner;
- tape capture within the seam allowance;
- backtack or reinforcement location;
- relationship to lining and internal binding;
- bulk where multiple seams meet;
- exposure of raw ends;
- opening alignment and panel symmetry.
The component specification and sewing construction must be approved together.
Buckle and adjuster types
| Component | Typical function direction | Critical controls |
|---|---|---|
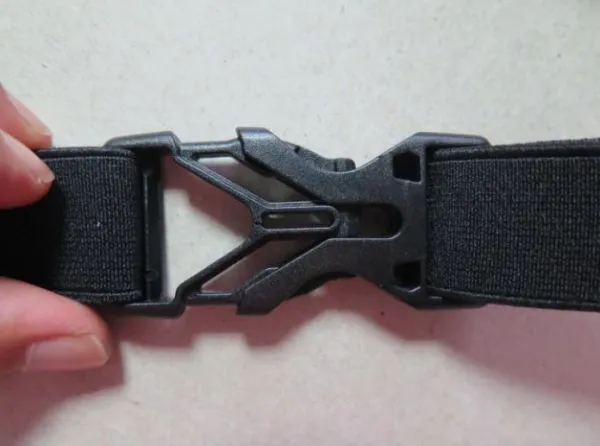
| Side-release buckle | Quick mating closure | Male/female set, webbing slots, orientation, operation |
| Ladder-lock adjuster | Adjusts webbing through a toothed or friction path | Routing, webbing thickness/hand, slip and tail direction |
| Triglide or slide | Adjusts or retains a strap through multiple slots | Slot dimensions, routing, doubled layers, edge clearance |
| Cam buckle | Clamps webbing with a moving part | Webbing compatibility, operating force, release and wear |
| Cord lock | Controls one or more cords | Hole/cord diameter, spring direction, travel and retention |
| Sternum or specialty buckle | Connects a defined strap system | Rail/strap interface, position, user and complete assembly |
Names vary among suppliers. Approve the physical component and routing diagram rather than relying only on a generic label.
Webbing specification
Webbing is a woven narrow material used in handles, straps, anchors, adjustment systems and trim. Width alone is not a complete specification.
Record:
- fibre or material direction and required evidence;
- weave and approved reference quality;
- finished width and tolerance;
- thickness or mass direction where relevant;
- hand, stiffness, edge feel and surface texture;
- colour and physical approval standard;
- stretch or recovery direction if relevant;
- cut-end treatment;
- print, jacquard or branding requirements;
- intended component routing and load path;
- relevant abrasion, colourfastness, load or other project tests.
Soft, thin webbing may slip through an adjuster intended for a firmer strap. Thick webbing may be difficult to route through a slot or double back. Approve the actual webbing-hardware pair.
Webbing routing and adjustment range
A strap specification should show:
- fixed and adjustable ends;
- route through every adjuster, keeper and ring;
- minimum and maximum effective length;
- tail length in representative settings;
- foldback and stitch position;
- whether the loose end can pull through;
- twist-free orientation;
- strap-pad relationship;
- operation while the bag is empty and loaded.
Nominal cut length is not the same as effective carrying length because folds, anchors and hardware consume webbing.
Hooks, rings and connection hardware
Common directions include swivel hooks, snap hooks, D-rings, rectangular rings and O-rings. Define:
- internal clearance and wire or body dimensions;
- gate opening and closure where applicable;
- rotation or swivel requirement;
- mating webbing or strap width;
- material and surface finish;
- colour under a physical approval reference;
- edge smoothness and snag concerns;
- intended orientation and load direction;
- reinforcement and seam construction at the anchor.
A hook may pass through a ring when unloaded but bind after the strap rotates or the bag is filled. Review the installed geometry through its range of motion.
Snaps, rivets, eyelets and magnetic parts
These components create holes or concentrate force in the surrounding material. The component set can include visible caps, mating pieces, washers, backing layers or installation tooling.
Control:
- component and mating-set code;
- post, barrel or shank length relative to the layer stack;
- hole or installation dimensions;
- backing and reinforcement coverage;
- visible orientation and finish;
- opening/closing or retention direction;
- proximity to edges and seams;
- user, product and regulatory considerations where applicable.
Magnets can affect some carried items and may have market-specific requirements. Suitability needs project review; the term “magnetic button” is not enough.
Plastic, metal and finish choices
Material family does not create a simple quality hierarchy.
Plastic hardware can vary by resin, formulation, geometry, moulding, colour and temperature behaviour. Metal hardware can vary by base metal, casting or forming route, plating, coating, edge finish and corrosion behaviour.
Ask:
- what exact material and finish direction is proposed;
- what visual reference controls colour and gloss;
- whether weight or skin-contact direction matters;
- which temperature, corrosion, abrasion, chemical or cycling exposures are relevant;
- whether sharp edges, burrs, flashing or surface defects are unacceptable;
- what documentation or test evidence is required for the target market.
“Metal is stronger” and “plastic never rusts” are not adequate selection rules.
Colour and surface approval
Black components from different suppliers may differ in gloss, texture and undertone. Plated finishes can also look different under changing light and viewing angle.
Use:
- physical approval samples;
- identified colour standards where applicable;
- agreed lighting and viewing conditions;
- face/reverse or lot comparisons;
- controlled limits for visible variation;
- a signed component board or approved sample revision.
Screen images are unsuitable as the sole colour or finish standard.
Attachment is part of component performance
A buckle, ring or hook works through its anchor. Review the complete load path:
- component body and slot or gate;
- mating webbing, cord or strap;
- fold, overlap and routing;
- stitch programme or mechanical installation;
- reinforcement layer;
- shell or structural panel;
- nearby seams and edge distances;
- direction of use and possible off-axis loading.
A high-rated component cannot compensate for webbing that slips, a narrow reinforcement patch or an anchor sewn only to lining.
Water protection and component openings
Zippers, snaps, eyelets, rivets and hardware attachments can create water-entry paths. A reverse coil, coated face or protective flap may be one design direction, but finished performance also depends on:
- chain and slider path;
- zipper ends and garages;
- sewn tape and needle holes;
- surrounding seam construction;
- open gaps at hardware;
- bag orientation and exposure duration;
- wear, flexing and contamination.
Define whether the need concerns splash, rain, water pressure, leakage or submersion, then test the representative finished product. Do not convert a component description into a universal waterproof claim.
Common component problems and questions
| Observation | What to investigate |
|---|---|
| Zipper feels rough | Chain/slider match, curve, tension, contamination, end geometry, panel distortion |
| Slider comes off | Stops, slider/chain compatibility, end treatment, damage or assembly |
| Webbing slips | Width/thickness/hand, adjuster geometry, routing, surface wear or load direction |
| Strap twists | Routing, hook/ring orientation, anchor alignment, pad and adjuster positions |
| Buckle opens unexpectedly | Mating set, engagement, contamination, deformation, operating contact or load |
| Hook binds on ring | Gate clearance, ring dimensions, rotation, finish or loaded geometry |
| Finish changes | Abrasion, corrosion, chemicals, sweat, cleaning, coating or base material |
| Rivet or snap loosens | Post length, installation, hole, backing layers, material creep or repeated loading |
| Component cracks | Material, moulding, temperature, impact, geometry, load or ageing |
These are investigation prompts, not automatic root-cause findings.
Component sample and approval workflow
- Map the user action, contents, load and environment.
- Define the opening, adjustment or connection function.
- Shortlist compatible component families and mating parts.
- Record critical dimensions, materials, colours and finishes.
- Trial the actual zipper-panel, webbing-adjuster or hook-ring assembly.
- Review hand operation, clearances, routing and visual match.
- Build the components into a representative bag sample.
- Check access, adjustment, movement and loaded geometry.
- Complete agreed component and finished-product tests.
- Freeze supplier/code, component board and approved sample revision.
- Require written approval before substitution.
An isolated component sample cannot reveal interference with seams, corners, lining or contents.
Incoming, in-line and final checks
An order-specific quality plan may include:
- incoming: identity, dimensions, colour/finish, visible defects, mating compatibility and required documents;
- in-line: correct location, orientation, routing, seam or mechanical installation and operation;
- final: zipper travel, buckle engagement, strap adjustment, hook rotation, appearance and agreed loaded or functional checks;
- change control: lot identification, approved substitution record and disposition of nonconforming parts.
Inspection activities, sampling and limits must be agreed for the order. First-party factory images show examples of checks, not a universal test package. Review the Benshine quality-control framework.
RFQ checklist for zippers and bag hardware
Send Benshine:
- bag type, user, contents and representative load;
- annotated component locations and user-operation sequence;
- zipper construction, opening direction, lengths, slider and puller needs;
- buckle, adjuster, hook, ring, snap, rivet or cord-lock directions;
- webbing width, thickness, hand, colour and routing;
- component materials, colours and finishes;
- reinforcement, seam and anchor requirements;
- relevant rain, corrosion, abrasion, temperature, cycling or chemical exposure;
- required test methods, documents and acceptance criteria;
- supplier or brand controls and approved alternatives;
- quantity by colour and variant, packaging and destination;
- physical reference components or a marked sample.
Benshine can review component directions for a controlled custom-bag project. Compatibility, availability, custom tooling, performance, compliance, MOQ, price, sample timing and production timing require confirmation for the selected parts and order.
Continue your component research
- Use the bag anatomy and terminology glossary
- Understand bag patterns, gussets and pocket construction
- Compare bag stitch types and seam construction
- Choose a bag structure for intended use
- See how custom bags are made
- Review Benshine quality-control planning
- Send Benshine a controlled component brief
Quick answers
What zipper details should a bag specification include?
Record the zipper construction and size direction, tape and element colours, slider quantity and orientation, puller design, opening and chain lengths, curve, end treatment, installation layers and any project-specific performance evidence.
Are zipper sizes standardized across every supplier?
Do not assume that a nominal size, slider or component from one supplier is interchangeable with another. Use an approved supplier and component code or confirm physical dimensions, compatibility, appearance and performance with samples.
How do you choose a buckle for a bag?
Start with the buckle function, mating webbing width and thickness, operating direction, attachment geometry, user, load, environment, material and finish. Approve the complete buckle-webbing assembly rather than the buckle in isolation.
Why specify webbing width and thickness?
Width alone does not define hand, stiffness, weave, edge feel or compatibility with an adjuster. Thickness and construction influence how webbing bends, grips, slips and passes through the selected hardware.
Does metal bag hardware always last longer than plastic hardware?
No. Suitability depends on material grade, geometry, finish, load, abrasion, corrosion exposure, temperature, weight and attachment. Validate the exact component and assembly for the intended use.
Does a coated or reverse-coil zipper make a bag waterproof?
No zipper appearance or construction alone proves finished-bag waterproofness. Water ingress can occur through the chain, slider path, zipper ends, stitching, seams and other openings. Define the exposure and test the complete representative product.