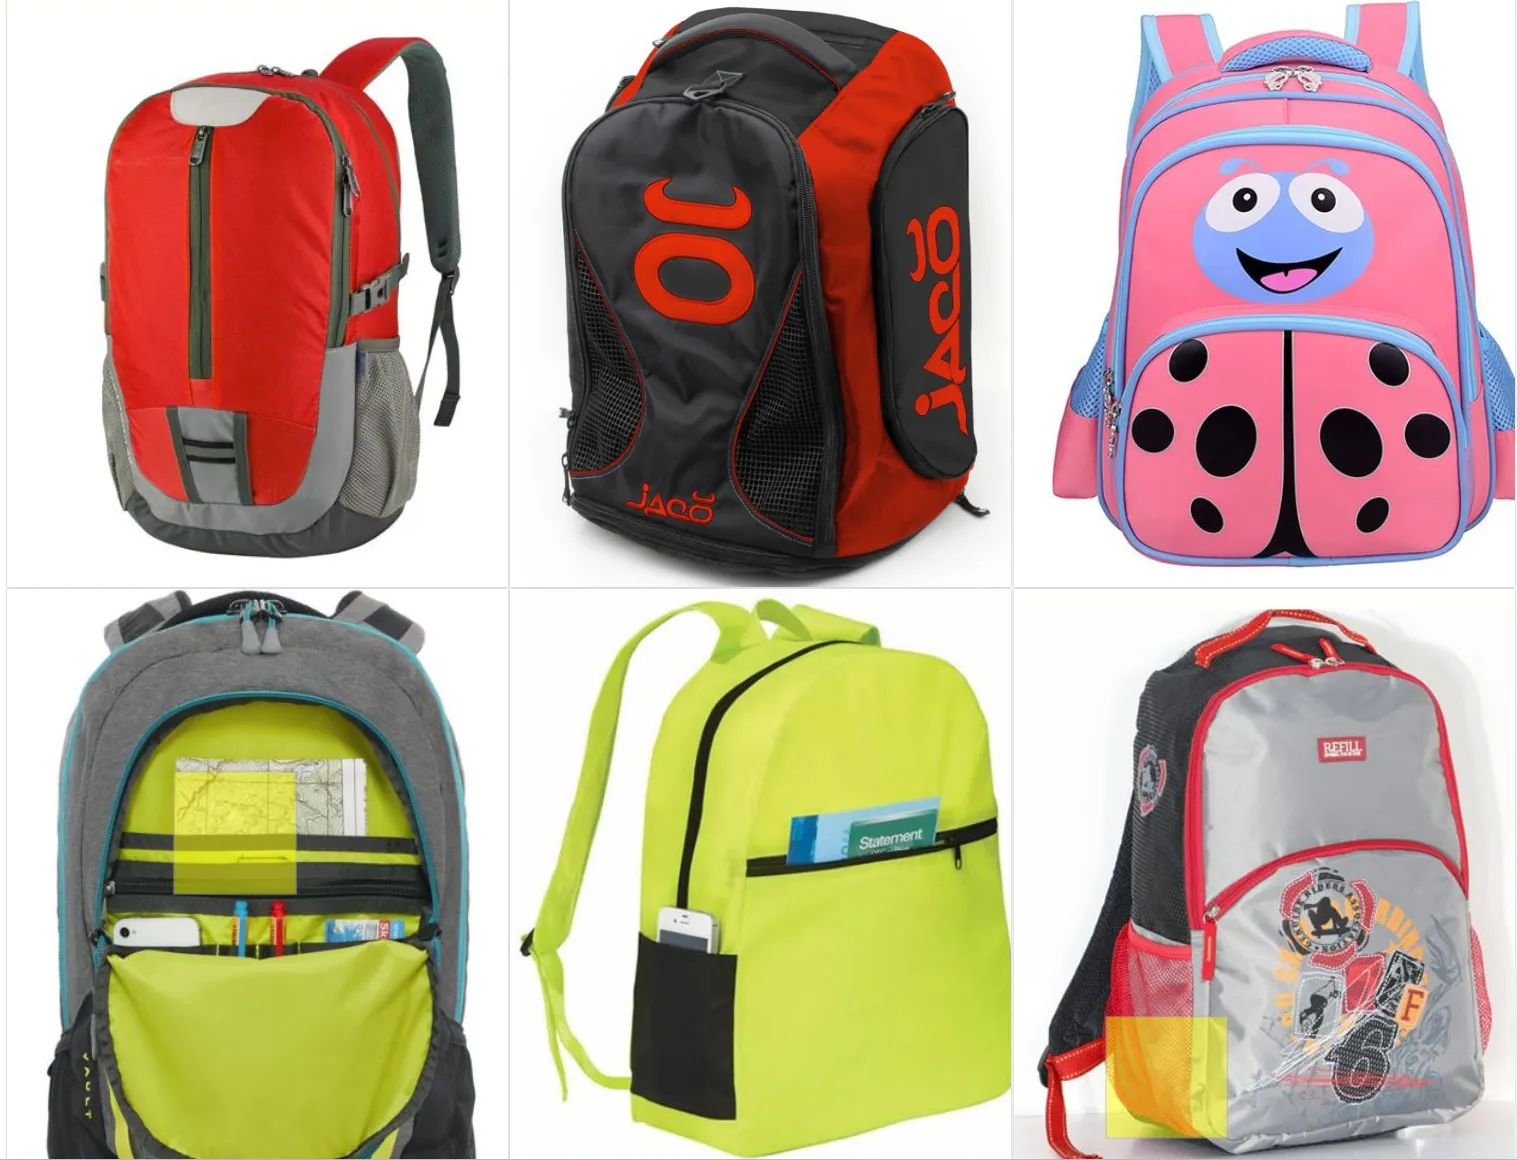
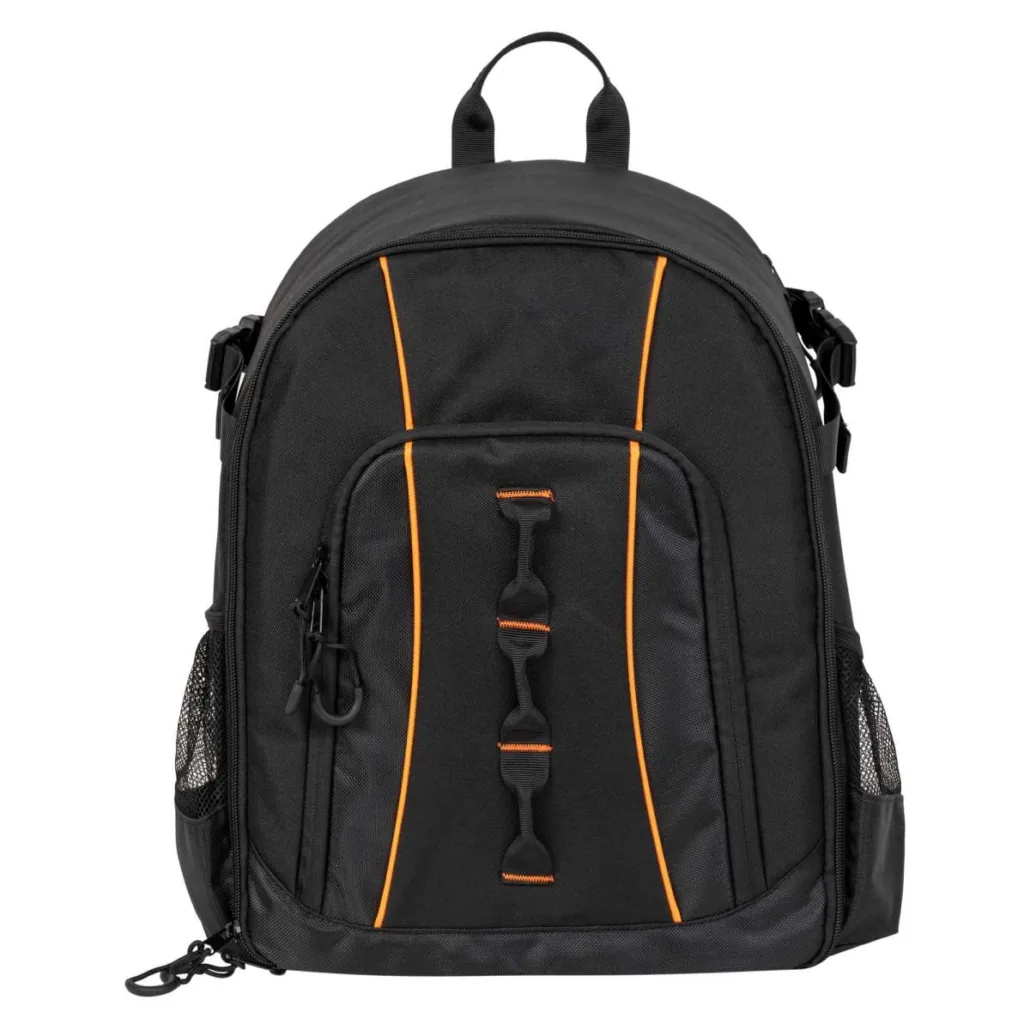
A backpack is a container, access system and body-carried load path. Its design should begin with the user, contents and journey—not a generic litre target or exterior style. A commuter laptop pack, school bag, foldable daypack and equipment backpack can require very different structures and tests.
Direct answer: Define a backpack design from the user group, item inventory, packed mass, usable dimensions, access sequence and carrying duration. Map every compartment, material layer, zipper, reinforcement, shoulder strap and back-panel feature to that use. “Backpack” does not automatically prove capacity, comfort, protection, load strength, water resistance, breathability, visibility or durability.
Backpack specification at a glance
| Decision | Buyer input | What not to assume |
|---|---|---|
| User | Age or body range, clothing, use duration and movement | Universal fit or comfort from one strap shape |
| Load | Item list, dimensions, mass and packing order | Capacity from litres or external dimensions alone |
| Access | Top, panel, clamshell or compartment openings | Easy retrieval from pocket count |
| Materials | Exact shell, lining, mesh, foam and supports | Strength or waterproofness from fibre name or denier |
| Organization | Laptop, bottle, footwear, document and small-item zones | Protection or usable space from a divider drawing |
| Carrying | Strap shape, spacing, adjustment, back panel and handle | Load safety from padding thickness or webbing width |
| Evidence | Named finished-product method and pass rule | Universal durability, compliance or commercial terms |
This page focuses on building a sourcing specification. The backpack selection guide supports buyer-side format choices, while the bag structure guide explains broader architecture decisions.
Start with the user and journey
Identify who carries the backpack and under what conditions. Record body-size or age range where relevant, clothing layers, journey length, movement, transport and whether the bag is frequently removed. A brief commute, school day, outdoor activity and equipment service route impose different fit and access demands.
Define whether the bag sits upright, under a seat, inside luggage or on a hook between uses. Note rain, dust, abrasion, soil and cleaning exposure. If multiple user groups are expected, decide whether one adjustment range and body geometry can serve them or whether separate sizes are needed.
Avoid universal comfort or ergonomic claims. Fit and perceived comfort depend on the specific user, load and duration and should be reviewed under representative conditions.
Build a controlled payload inventory
List every intended item with length, width, thickness and mass. Common examples include laptop, tablet, documents, books, charger, bottle, clothing, shoes, camera components or activity-specific equipment. Record hard edges, fragile zones, heat, moisture or contamination concerns.
Create a packing order and identify which items need rapid access. Weigh the complete representative load rather than estimating from the largest object. A backpack that fits everything may still carry poorly if dense items sit far from the back or shift during movement.
Where several configurations are required, document each layout and identify the controlling case. Do not combine the maximum dimensions of one scenario with the maximum mass of another unless that combined load is actually intended.
Separate external size, usable volume and item fit
External height, width and depth include fabric, foam, piping, curved panels and pockets. Usable space is reduced by lining, laptop sleeves, dividers, seam allowances and back-panel structure. A litre figure can also vary with the measurement method.
Specify finished outside dimensions, usable compartment dimensions and clear opening using named points and bag condition. If capacity in litres is required, define the calculation or physical fill method, but keep the real packing layout as the final fit check.
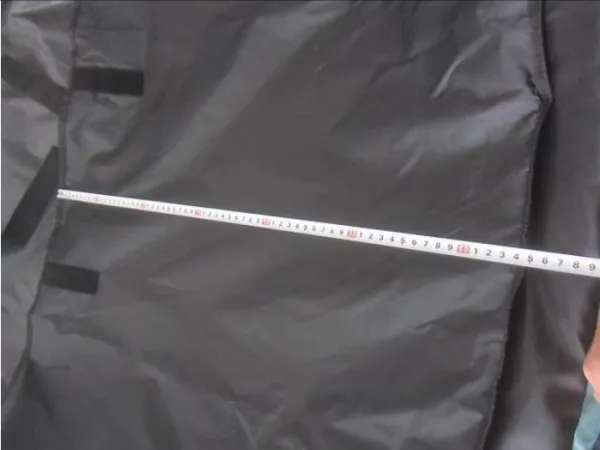
Flexible backpack dimensions need consistent reference points. Item fit and access are confirmed with the intended packed load.
Place dense items close to the carrying side
The location of mass influences how the backpack pulls away from the user and how straps and panels are loaded. A laptop sleeve or heavy-item zone is often considered near the back panel, but the exact arrangement depends on item geometry, padding and access.
Map the centre of the packed load in the approved layout. Check whether front pockets become overloaded, bottles create side imbalance or a bottom compartment shifts weight away from the back. Review the bag on representative users while standing and moving.
Do not describe a layout as balanced from an empty product photo. Use the real contents and expected carry duration.
Choose the opening from the access sequence
Top-loading, panel-opening, clamshell and multi-compartment backpacks support different workflows. A wide clamshell can expose the whole interior but needs a long zipper and clear lay-flat space. A top opening can contain contents but may make lower items harder to reach.
Define zipper routes, clear openings, puller positions, stops and how the user holds the bag during access. Check whether contents interfere with closure and whether a full pocket blocks another opening. For security-oriented directions, define the actual access-control goal rather than relying on “anti-theft” styling.
Test retrieval of priority items with the intended load. Pocket count is not a substitute for usable access.
Design compartments around items and sequence
For every pocket or divider, state the intended item, dimensions, access direction, closure and retention. Distinguish fixed, adjustable and removable organization. Elastic loops, mesh pockets, pen slots and cable zones should be sized around real objects.
Check that internal organization does not reduce the main compartment beyond the approved payload. A full front organizer can pull the front panel outward; a loaded bottle pocket can narrow the main body. Load all zones together during sample review.
Use colour or labels only where they support the workflow. Avoid decorative complexity that adds seams and process steps without a defined user function.
Specify laptop and device protection precisely
Record device length, width, thickness, mass, port or hinge concerns and whether a protective case remains. Define sleeve usable dimensions, opening, closure, lining, padding coverage and retention. State whether the sleeve should be suspended above the backpack base and by how much.
Padding thickness alone does not prove protection. Foam family, density, compression, coverage, gaps, seam paths and item fit all matter. A loose device can move; an overly tight sleeve can strain seams or make removal difficult.
If a protection claim is required, define the packed item or surrogate, drop or compression direction, height or force, surface, sample condition and pass criteria. Test the complete bag, not a flat foam swatch.
Select shell and lining as complete constructions
“Nylon,” “polyester,” “canvas” and “PVC” are not complete backpack specifications. Record exact fibre composition, yarn or denier direction where relevant, weave, weight, coating or lamination, colour, finish, usable width and supplier reference. Identify the face and reverse of each material.
The lining influences visibility, hand, cleaning and pocket construction. Define composition, weight, colour and backing. If light-coloured lining is used to improve item visibility, approve show-through and stain acceptance. Map reinforcements, foam, boards and interlinings by panel.
Use the nylon versus polyester guide and 600D versus 900D guide to avoid treating fibre or denier as a performance guarantee.
Water claims belong to the complete backpack
A coated or laminated shell does not make the finished backpack waterproof. Needle holes, seams, zippers, pocket openings, webbing anchors, hydration ports and other penetrations can admit water.
Define exposure such as splash, rain, spray, standing water or immersion; these are not interchangeable. Name the protected compartment, closure procedure, duration and acceptable ingress. If a rain cover is included, specify coverage, attachment, storage and use procedure separately.
Use the water-resistant versus waterproof bag guide to write a finished-product protocol.
Build the shoulder straps for the user range
Strap geometry includes top spacing, angle, curve, finished width, length, adjustment range and connection to the bag. Define foam or padding construction, face and edge materials, webbing, adjusters and lower anchors. One visual strap shape may not fit every body range.
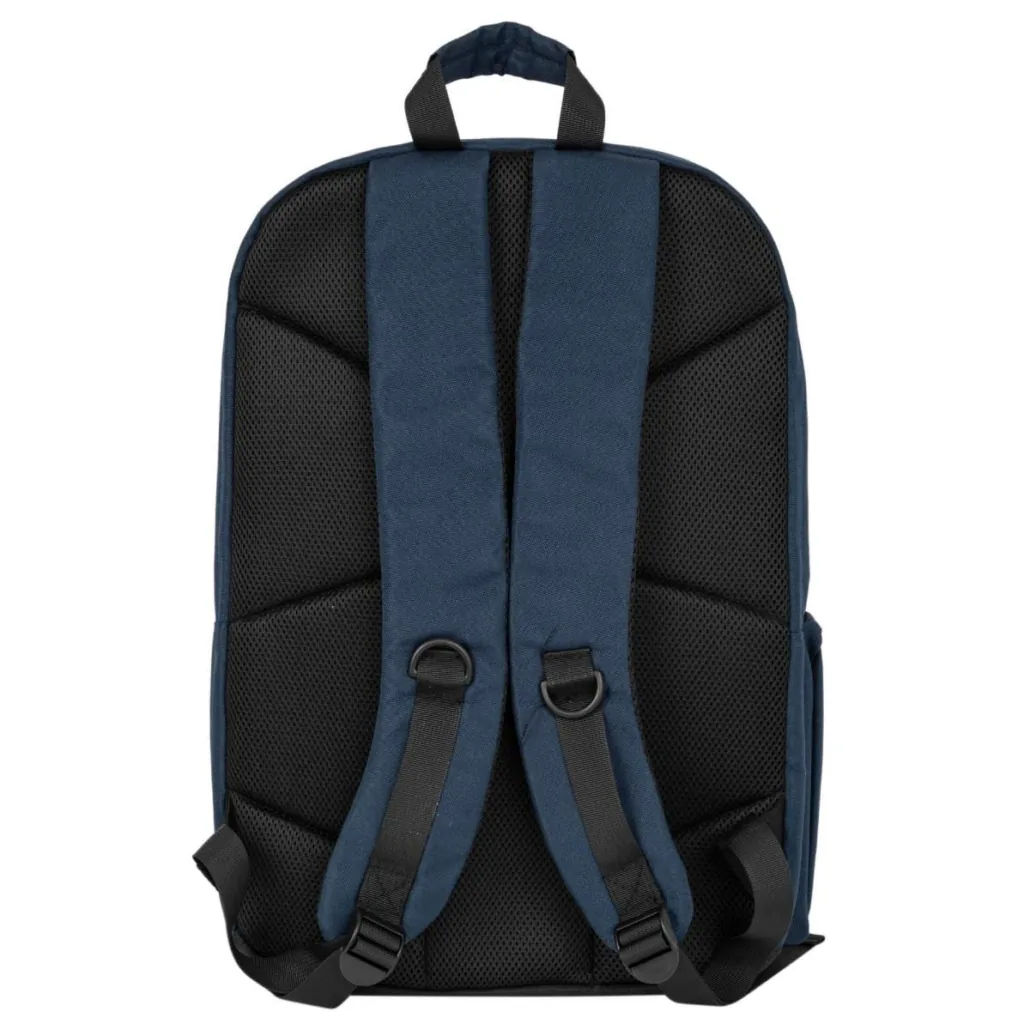
BE015 illustrates a padded carrying direction with adjustable straps, mesh-facing areas and multiple attachment points. It does not establish universal comfort, ventilation or load performance.
Test adjustment at both ends of the intended range with representative clothing. Check whether adjusters remain accessible, loose webbing is controlled and strap edges or hardware contact the user. Inspect symmetry in the bag’s empty and loaded states.
Design the back panel around structure and contact
Back-panel foam, mesh, channels, frames and supports can change body, contact and airflow direction. Visible mesh or raised pads do not prove breathability or cooling. Air movement depends on coverage, compression, clothing, climate, movement and load.
Define contact zones, stiffness, padding thickness and any internal support. Check whether hard contents or compartment seams can be felt through the back. If a frame or board is used, specify dimensions, edge treatment, removability and retention.
Evaluate pressure and comfort with the intended payload and representative users. Avoid universal ergonomic, posture or health claims without appropriate evidence.
Connect every carrying component to a load path
Shoulder straps, lower anchors, top handle, sternum strap, waist belt and compression straps transfer force through webbing, seams, reinforcements and body panels. A strong buckle or webbing does not prove the installed assembly.
Map attachment location, reinforcement material, size and orientation. Define seam pattern, thread and accessible reverse-side construction. Review transitions where flexible straps meet a stiff back panel.
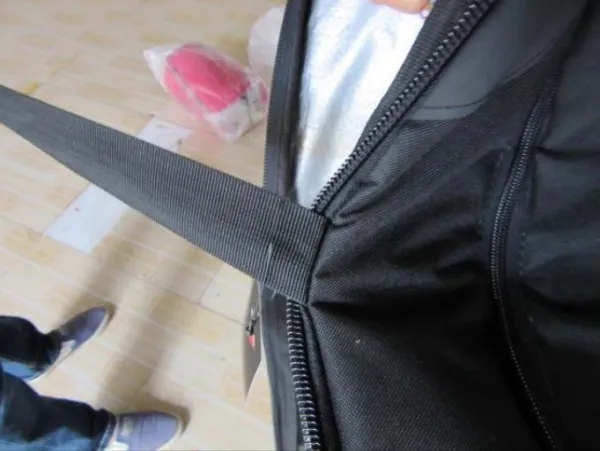
A pull check is meaningful only when sample revision, direction, force or load, duration and acceptance criteria are defined.
Use a written finished-product load protocol covering packed mass, distribution, lift or cycle direction, duration or cycles and pass criteria. Inspect stitching, fabric, reinforcement, hardware and permanent deformation together.
Treat the top handle as a separate carry point
A grab handle may be used to lift the entire packed bag, hang it or move it short distances. Define intended use, material, length, hand clearance, reinforcement and attachment. The handle can concentrate load at the backpack top and should not be treated as decoration.
Test it separately if users are expected to lift the loaded bag by that point. Check interaction with the main zipper, shoulder straps and hanging orientation. A padded wrap changes bulk and hand feel but does not prove load strength.
Map pockets, bottles and external attachments
Side bottle pockets need container diameter, height, retention and access criteria. Elastic, mesh, drawcord or strap retention can behave differently when the main compartment is full. Test both sides and the intended bottle mass.
External loops, daisy chains, cords and straps should have named payloads and attachment limits. Decorative webbing should not be presented as load-bearing without a controlled specification and test. Map any hanging item so it does not interfere with walking, zippers or branding.
For footwear or wet-item zones, define separation, ventilation, cleaning and intrusion into the main compartment. The activity label alone does not establish hygiene or moisture performance.
Compare structured and foldable backpacks honestly
A structured pack can support organization and shape but adds materials, weight and packed volume. A foldable backpack can compress for storage but may provide less body and may wrinkle or transfer load differently. Neither direction is universally better.
The Benshine BP12 reference illustrates a lightweight foldable direction with shoulder straps, top closure and a stored configuration. Its image is a format reference; exact material, dimensions, capacity and performance require project confirmation.
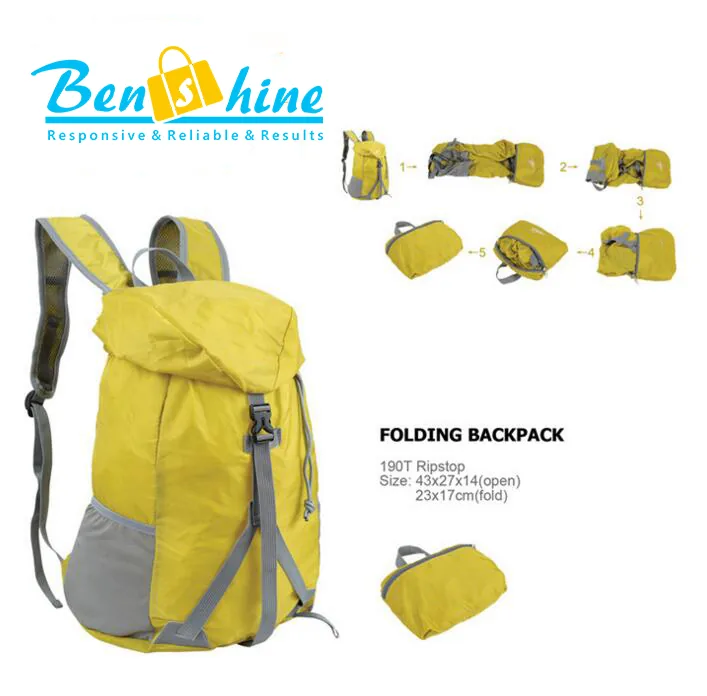
Define folded dimensions, folding sequence, storage pocket and recovery expectations. Load and test the product in its open state, then inspect it after the approved packing cycle.
Reflective-looking trims need evidence and placement rules
Bright colours and reflective-looking tapes can support visibility direction, but appearance under studio light does not prove retroreflective performance or user safety. If a visibility claim matters, define the trim identity, placement, viewing geometry, test method and pass criteria.
Map trim away from fold lines, abrasion zones and seams that interrupt the visible area. Check after cleaning or flexing if those exposures are part of use. Avoid safety claims based only on colour or a reflective stripe.
Develop zippers, buckles and adjusters as installed systems
Specify zipper chain, size direction, tape, slider, puller, stops and installation. For buckles and adjusters, define mating components, webbing width and routing. Supplier size names do not guarantee cross-brand compatibility.
Check clear opening, corner travel, one- or two-way operation and puller access under load. Test strap adjustment for slip and ease across the intended range. The zipper, buckle and webbing guide provides detailed component fields.
Control seams at curves and thick intersections
Thread, needle, stitch type, spacing, seam allowance and tension interact with shell, lining, foam, binding and reinforcement. Shoulder curves, zipper ends, handle anchors and base corners can create thick transitions.
Create a seam map and define edge coverage, face and reverse appearance, skipped-stitch limits, start and end treatment and repair rules. Dense stitching does not automatically create a stronger joint. Use the bag stitch-length guide for measurement and inspection rules.
Place branding around pockets, curvature and wear
Provide artwork, dimensions, colour target, process, location and orientation. Curved front panels, pocket seams, compression straps and folds can distort or hide a logo. Mark clearances on the drawing.
Printing, transfer, embroidery, patches and labels interact differently with fabric, coating, foam and lining. Approve a strike-off on the exact production material and colour. Review opacity, registration, hand, reverse-side construction and required rubbing, flexing or cleaning results.
Do not let branding cover a functional vent, reflective zone or seam inspection point unless that interaction is deliberately approved.
School and youth projects need defined users and markets
Do not infer age suitability from colour or size. Define the intended age or body range, contents, packed mass, adjustment range, identification features and destination market. Hardware, cords, small parts, visibility and labelling requirements can vary by product and jurisdiction.
Avoid medical, posture-correction or developmental claims without appropriate evidence. Evaluate fit and carrying with representative users and realistic loads. If a buyer has a load policy or institutional requirement, include it in the specification and instructions.
Packaging can change padding and shape
Folding and compression can crease shell panels, compress foam, bend supports and mark coatings or prints. Define fold sequence, strap arrangement, inserts, individual packaging, carton quantity and orientation.
Run a pack-out trial with production-intent materials. After the defined storage or transit simulation, reopen the backpack and inspect dimensions, shape, foam recovery, supports, zippers, hardware and artwork. If a recovery period is allowed, state it.
Approve backpacks in controlled stages
- Use and payload brief: user range, items, mass, journey and exposure.
- Packing layout: usable dimensions, access sequence and centre-of-load review.
- Material swatches: shell, lining, mesh, foam, support and evidence.
- Carry mock-up: strap geometry, back panel, anchors and adjustment range.
- Finished sample: compartments, zippers, hardware, branding and packaging.
- Representative-use tests: fit, load, protection, water, cleaning and other named protocols.
- Pre-production sample: freeze pattern, bill of materials, workmanship and pack-out.
A substitution in shell, foam, mesh, zipper, buckle, webbing, board, pattern or packaging can affect earlier findings. Use documented change control and repeat relevant approvals.
Production quality-control points
Order-specific inspection can include:
- shell, lining, mesh, foam, support and reinforcement identity;
- material weight, thickness, colour and surface condition;
- finished external and usable compartment dimensions;
- clear openings and representative-item fit;
- pocket, divider and sleeve position;
- laptop suspension and padding coverage where specified;
- zipper, buckle, adjuster and webbing function;
- shoulder-strap shape, spacing, symmetry and adjustment range;
- back-panel construction and support placement;
- handles, anchors and reinforcement;
- seams, binding, piping, corners and stitch condition;
- bottle pockets and external attachment points;
- artwork size, colour, position and workmanship;
- project-specific load, fit, water, protection or cleaning checks;
- folding, packaging, carton and traceability;
- conformity to the approved sample and revision.
Sampling does not prove every unit. Use the custom bag quality-control guide to connect incoming, first-piece, in-line and pre-shipment controls.
Custom backpack RFQ checklist
Send the manufacturer:
- intended user group, body or age range and use journey;
- item inventory, dimensions, packed mass and layout;
- finished external dimensions and usable compartment sizes;
- capacity method and clear-opening requirements;
- panel, pocket, divider and sleeve drawings;
- exact shell, lining, mesh, foam and support construction;
- material composition, weight, denier, colour and finish;
- zipper, buckle, adjuster, webbing and hardware details;
- shoulder-strap geometry, padding and adjustment range;
- back-panel, handle, sternum or waist features;
- laptop, bottle, footwear and activity-specific zones;
- water, soil, cleaning and environmental exposure;
- artwork, branding process, labels and placement;
- fit, load, protection, water, colour and cleaning protocols;
- target-market documents and evidence scope;
- approved swatch, sample and change-control requirements;
- quantity by colour, size and version;
- folding, packaging, carton, inspection and delivery requirements.
MOQ, price, feasibility and timing depend on materials, panel and pocket count, padding, hardware, colour splits, branding, testing, quantity and packaging. Request current project confirmation after the specification is reviewed.
Develop the backpack and carrying system together
Benshine can review commuter, school, travel, promotional, foldable and equipment-backpack directions around the real payload, usable dimensions, organization, materials, access, carrying, branding, tests and quality controls. Published references provide construction directions; exact claims and commercial terms remain project-specific.
Explore custom backpacks, review the BE010 structured-backpack reference, BE015 back-panel reference and BP12 foldable reference, or send your backpack specification.
Quick answers
What information is needed to design a custom backpack?
Define the user group, contents and item dimensions, packed mass, use journey, external and usable dimensions, opening, compartment plan, material layers, carrying system, branding, packaging and required tests. A drawing, reference sample or packing layout helps control the brief.
How should backpack capacity be specified?
Use a contents list and packing layout, then control usable internal dimensions and clear openings. A litre figure or external measurements do not prove item fit because padding, dividers, curved panels and pockets consume space. Confirm capacity with a loaded finished sample.
What makes backpack shoulder straps comfortable?
Comfort depends on user dimensions, strap shape, spacing, adjustment range, width, padding, edge construction, back panel, load, duration and movement. No single foam thickness or strap width proves comfort; evaluate representative users with the intended packed load.
Does a padded backpack protect a laptop or equipment?
Padding can separate an item from contact, but protection depends on fit, material, thickness, compression, coverage, suspension from the base, openings and impact direction. Define the device and test the complete packed bag under a written protocol.
Is a polyester or nylon backpack waterproof?
Not automatically. Fibre name, denier or coating does not establish finished-bag waterproofness. Seams, zippers, openings, pockets and attachments create water paths. Define the exposure, protected zone and acceptable ingress, then test the complete closed backpack.
What belongs in a custom backpack RFQ?
Include user group, contents, dimensions and packed mass, capacity method, panel and pocket plan, shell and lining, padding and supports, zippers and hardware, shoulder straps and back panel, branding, tests, evidence requirements, quantity, packaging and delivery requirements.