
Stitch length is a small measurement with a large effect on bag appearance, material perforation, feeding, seam consistency and inspection. It should not be selected from fabric weight alone or copied as one generic number across every seam.
Direct answer: Specify bag stitch length as a measurable range for each critical seam, expressed in millimetres per stitch or stitches per inch (SPI). Approve the range on the actual material stack with the selected stitch type, thread, needle, seam geometry and equipment. Shorter stitches are not automatically stronger, and longer stitches are not automatically better for thick materials.
Bag stitch length and SPI at a glance
| Control | What it means | Buyer decision |
|---|---|---|
| Stitch length | Nominal distance from one needle penetration to the next | Unit, target range, location and measurement method |
| SPI | Number of stitches or intervals over one inch | Counting rule, rounding and acceptable range |
| Stitch density | General description of penetrations over a stated distance | Never use without a number, unit and location |
| Stitch type | How the thread forms the stitch | Lockstitch, chainstitch or another approved direction |
| Seam construction | How the material parts are joined | Layer stack, allowance, overlap, binding or turned edge |
| Thread and needle | Components creating and filling each penetration | Compatible sizes, material direction, colour and point |
| Acceptance evidence | Proof that the complete joint meets the brief | Approved sample, appearance, measurements and required tests |
This page focuses on stitch spacing and its production control. For bartacks, box-X patterns, lockstitch, seam classes and reinforcement geometry, use the broader bag stitch types and seam construction guide.
Stitch length and SPI describe the same spacing differently
Bag specifications commonly use either millimetres per stitch or stitches per inch.
- Millimetres per stitch: a larger number means the penetrations are farther apart.
- Stitches per inch: a larger number means the penetrations are closer together.
For a nominal conversion:
SPI ≈ 25.4 ÷ stitch length in mm
Stitch length in mm ≈ 25.4 ÷ SPI
These formulas help translate a drawing or buyer standard, but production should be checked directly. Machine settings, material feeding, curves, layer changes and rounding can create variation from a mathematical conversion.
State which convention controls if both appear in the specification. Avoid an ambiguous note such as “4 stitches” without the measurement distance.
Define how the measurement is taken
A repeatable measurement instruction should identify:
- the named seam and side of the bag;
- a straight representative section;
- the length over which stitches are counted or measured;
- whether the count uses needle intervals or visible thread segments;
- how partial stitches at each boundary are handled;
- whether the result is reported as an average or each interval;
- the permitted range and defect classification;
- exclusions such as starts, ends, corners or step changes.
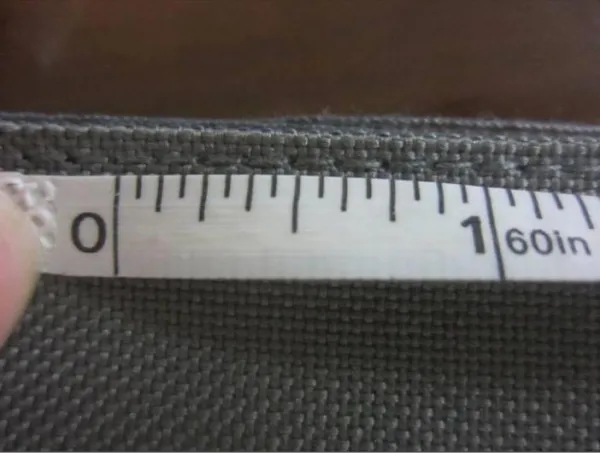
A stitch measurement is useful only when the seam location, counting distance, unit and acceptance range are controlled. The image demonstrates inspection technique, not a universal target value.
Photographs in an inspection report should show enough context to identify the seam, then a close view of the scale and stitch line. A close-up without location can be difficult to trace to the product drawing.
Use a seam map instead of one whole-bag number
A bag can contain many different sewing conditions. Create a seam map or callout table for locations such as:
- main shell panel joins;
- lining joins;
- visible topstitching;
- zipper-to-panel seams;
- binding seams;
- folded hems and openings;
- pocket installation;
- piping seams;
- webbing or handle attachment;
- shoulder-strap assembly;
- foam or reinforcement transitions;
- closing seam after turning;
- bartacks and programmed reinforcement.
Group locations only when their material stack, stitch type, function and appearance are genuinely comparable. A neat topstitch on two shell layers does not establish the correct setting for a dense webbing attachment.
Material stack matters more than the fabric label
“Nylon,” “polyester,” “canvas” or “heavy fabric” is not enough information. The needle may pass through a combination of:
- shell fabric and coating;
- lining;
- foam, spacer mesh or felt;
- webbing;
- binding;
- zipper tape;
- reinforcement patch;
- folded seam allowances;
- piping or corded edge;
- printed, laminated or film-like layers.
The thickest point may contain several times the layers of a normal panel seam. Feed behaviour can also change where the presser foot climbs onto or off a step. Evaluate the true stack at straight sections, corners and transitions.
Use the bag pattern and gusset guide to coordinate seam allowance and mating parts, and the nylon versus polyester guide to avoid treating the fiber name as a complete material specification.
Shorter stitches are not automatically stronger
Reducing stitch length places more needle penetrations within the same distance. This may change seam behaviour, but it can also create risks:
- perforation concentrated along one line;
- visible hole damage in coated or laminated material;
- puckering or distortion;
- thread crowding;
- reduced flexibility at a fold;
- difficulty feeding thick or sticky layers;
- heat or abrasion effects at the needle;
- an edge tearing along a dense row of holes.
The result depends on the material, thread, needle, edge distance, seam allowance, reinforcement and load direction. Validate the assembly under the required test instead of assuming that more stitches always produce a stronger bag.
Longer stitches are not automatically correct for thick stacks
A longer stitch can suit some visual directions or help avoid excessive perforation, but it may also affect:
- curve control;
- containment of small seam allowances;
- thread exposure to abrasion;
- appearance consistency;
- start and end security;
- control around zippers or small components;
- the way a seam opens under load.
Thickness is only one input. Test the actual joint, including the highest layer transition and the narrowest curve that production must sew.
Coordinate thread, needle and stitch spacing
Thread and needle are part of the same system as stitch length.
Thread direction
Control the thread family, size system, colour, sheen and any required performance direction. A thicker thread changes visual scale, needle selection and hole filling, but does not automatically create a stronger joint.
Needle direction
The needle size and point must be compatible with the thread, materials, stitch type and machine. An unsuitable combination can contribute to skipped stitches, thread damage, large visible holes or material damage.
Tension and loop formation
A chosen spacing does not compensate for poor tension. Review both faces for loose loops, exposed interlock, puckering, unbalanced formation, thread abrasion and changes at layer transitions.
Approve the thread, needle and stitch-length direction together on representative panels before freezing the pre-production specification.
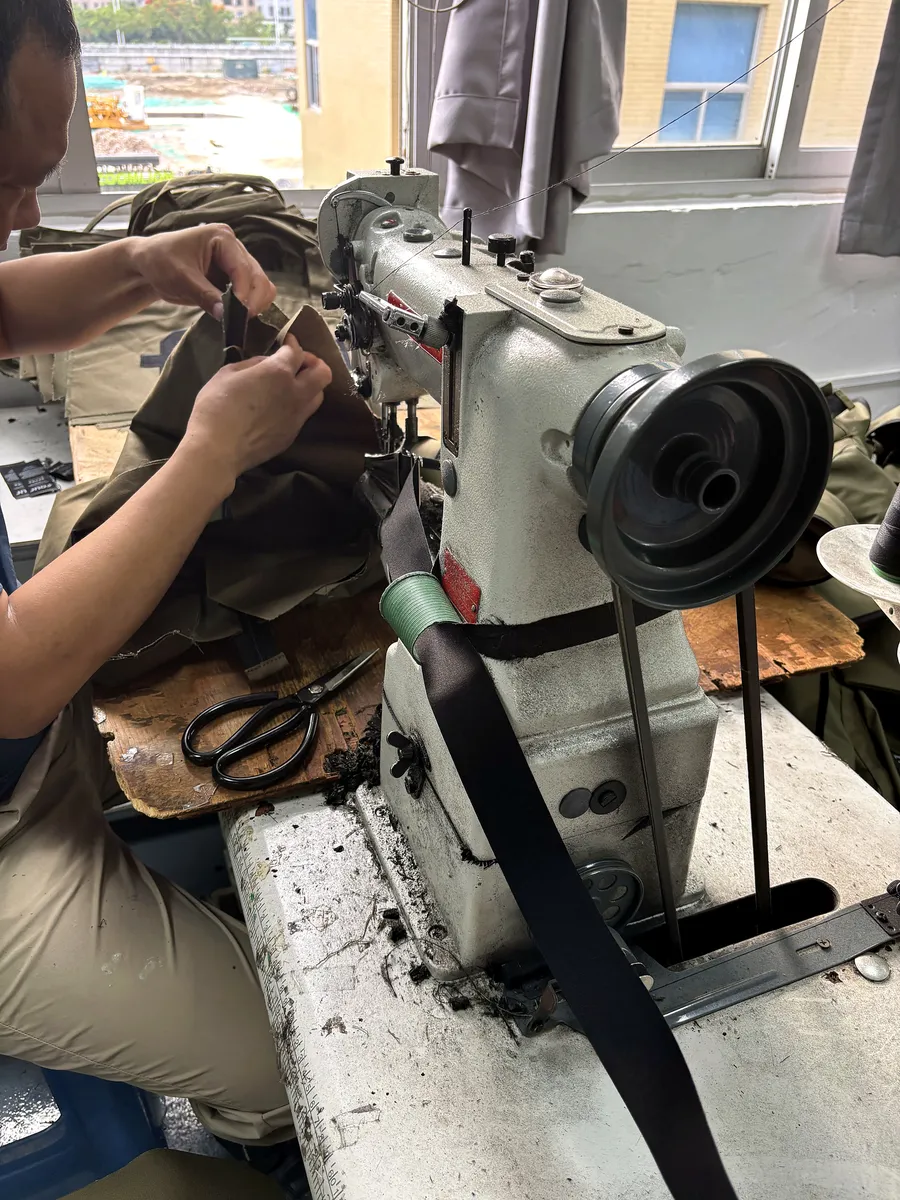
Webbing, folded edges and layered assemblies create different feeding and penetration conditions from a flat fabric swatch. The approved setting should cover the real production stack.
Different seam functions need different controls
| Seam function | Why spacing matters | Additional controls |
|---|---|---|
| Structural panel join | Influences penetration pattern and joint consistency | Allowance, thread, reinforcement, load direction |
| Visible topstitch | Strongly affects visual rhythm and straightness | Edge distance, colour, starts/ends, curvature |
| Zipper installation | Affects tape control and opening appearance | Tape exposure, slider clearance, end treatment |
| Binding | Must consistently catch the intended layers | Binding width, fold coverage, reverse-side capture |
| Curved pocket | Short-radius curves can alter feeding and appearance | Notches, seam allowance, curve smoothness |
| Webbing attachment | Dense stack and load path require assembly evidence | Reinforcement, pattern geometry, edge distance |
| Lining or internal seam | Appearance may be less visible but function still matters | Fraying, seam finish, turning and access |
| Coated water-control seam | Needle spacing affects the penetration line | Coating, seam treatment, exposure and ingress test |
For water-protection claims, ordinary stitching creates penetrations. Read the water-resistant versus waterproof bag guide and define the complete seam-treatment and finished-product test.
Curves, corners and step changes need separate review
Machine feeding is not identical along every path. Tight curves, small radii, bulky corners and abrupt layer changes can produce shorter or longer local spacing than a flat straight seam.
The inspection plan should state whether the general stitch-length range applies at these areas or whether they have separate visual and workmanship criteria. Useful checks include:
- smooth curve without abrupt angular segments;
- no missed capture of the seam allowance or binding;
- no skipped stitches at a step;
- acceptable stitch appearance immediately before and after the transition;
- controlled thread tension on both faces;
- no unintended pleats or puckering;
- defined repair rule if a line must be resewn.
Do not hide a local feeding problem inside an average taken only from the easiest straight section.
Starts, ends, backtacks and repairs are separate features
Backtacking or another start/end treatment creates overlapping penetrations and should not normally be included in the general straight-seam SPI measurement unless the specification says so.
Define:
- the start and end method;
- overlap length or programmed direction;
- whether it is visible or concealed;
- thread-tail treatment;
- acceptable repeated needle holes;
- repair and rework limits;
- treatment where several stitch lines meet.
Uncontrolled resewing can leave abandoned holes or a visibly dense section, especially in coated or tightly woven materials. The repair standard should be approved before production.
Appearance approval needs a physical reference
Stitch length changes the visual character of a bag. Review the actual colour and material because contrast thread, gloss, coarse weave and curved edges can make the same nominal setting look different.
Approve:
- straightness and visual rhythm;
- edge distance;
- thread colour and contrast;
- surface puckering;
- hole visibility;
- corners and curve smoothness;
- starts, ends and thread trimming;
- reverse-side appearance where exposed;
- consistency between left/right or paired components.
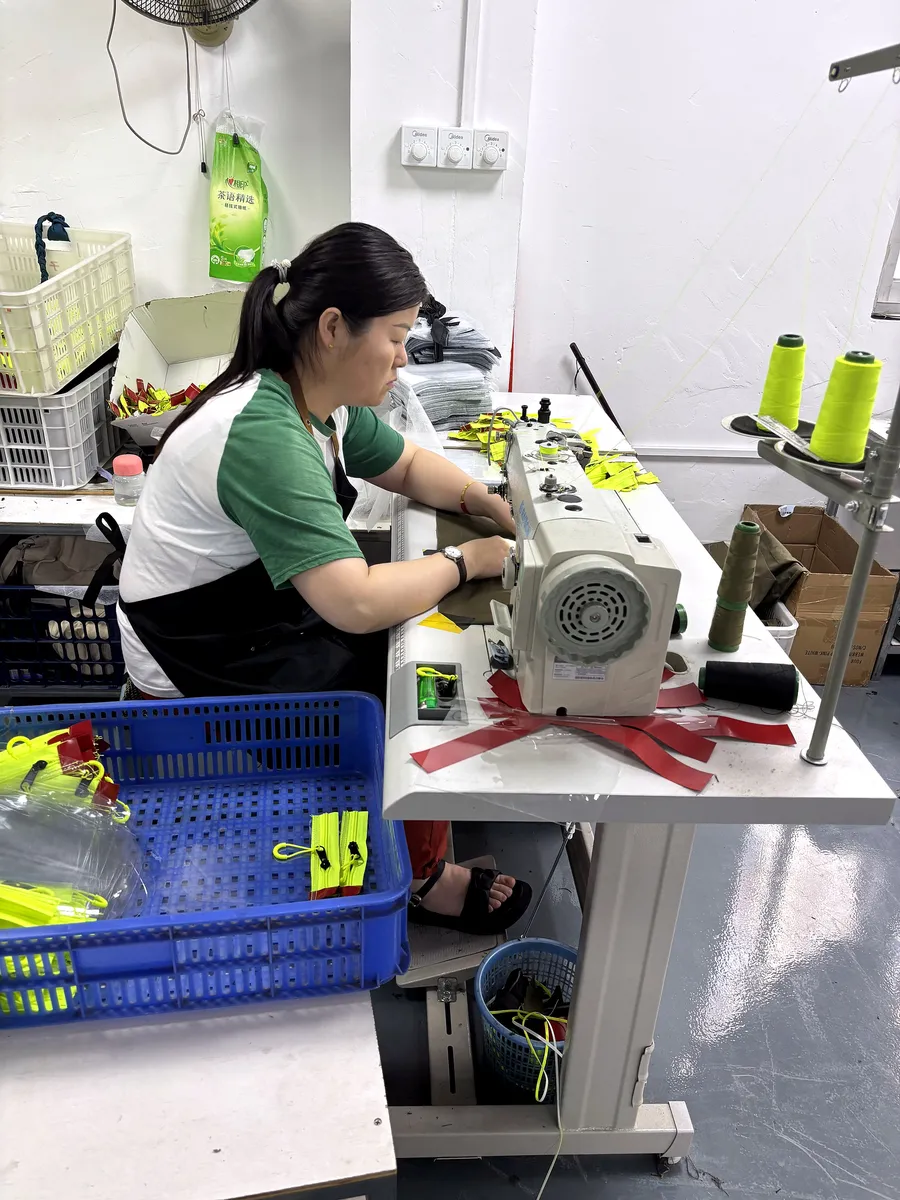
Production appearance depends on the complete operation: material preparation, guides, feeding, thread, needle, machine setting and operator handling all interact with the nominal stitch length.
A digital image can support communication but may not show hole size, thread sheen, puckering or hand accurately. Retain a controlled physical sample for critical appearance decisions.
Performance must be proven on the complete joint
If a seam has a strength, durability or water-protection requirement, define a test that represents its actual construction and load direction. Depending on the project, evidence may focus on:
- seam opening or slippage;
- thread or stitch failure;
- material tear beside the stitch line;
- webbing pull-out or reinforcement failure;
- cyclic opening, bending or loading;
- zipper-area distortion;
- water ingress through the complete treated seam;
- appearance after abrasion or cleaning.
Record where and how a sample failed. A higher load result is not meaningful if the specimen, conditioning, direction or test method differs. Stitch length is one variable within the assembly, not a standalone guarantee.
Develop the setting through controlled trials
A practical sample sequence can be:
- Material-stack coupons: compare a small set of proposed settings on exact layers.
- Seam mock-ups: reproduce allowance, fold, binding, zipper or webbing geometry.
- Prototype bag: review access, curves, transitions and visual consistency.
- Functional sample: apply project-specific loaded, cyclic, appearance or ingress checks.
- Pre-production sample: freeze seam map, range, thread, needle direction and workmanship.
- First-piece approval: confirm the production setup before continuous output.
Change one variable at a time where possible. If stitch length, thread, needle and reinforcement all change together, it becomes difficult to identify the cause of an improved or failed result.
Production inspection and defect rules
An order-specific quality plan can include:
- incoming thread and material identity;
- approved machine and operation direction where relevant;
- first-piece stitch measurement at named seams;
- in-line checks after setup, bobbin/thread changes or maintenance;
- visual checks at curves, starts, ends and transitions;
- final sampling at critical seam locations;
- comparison with the approved sample;
- functional testing at an agreed frequency;
- traceable records, photographs and disposition;
- re-inspection after adjustment or repair.
Possible defect descriptions should be measurable: outside the approved range at a named location, skipped stitch, unbalanced tension, loose loop, unacceptable puckering, missed binding capture, incorrect edge distance or unapproved repair. “Bad stitching” is too vague for repeatable decisions.
Use the custom bag quality-control guide to connect stitch checks with sampling, defect classes, containment and release.
Measurement example without a universal target
Suppose a buyer drawing controls a straight topstitch in SPI, while the factory work instruction uses millimetres per stitch. The teams can:
- convert the nominal value for discussion;
- sew the exact approved material stack;
- measure several representative sections;
- review appearance and any required performance;
- agree one production range and one controlling unit;
- record the approved sample and measurement method.
The lesson is not a particular number. It is that both parties use the same location, unit, method and acceptance rule.
Bag stitch-length RFQ checklist
Send the manufacturer:
- bag type, intended use and representative contents;
- drawings or sample identifying critical seams;
- complete material stack at each controlled location;
- stitch type and seam construction direction;
- preferred unit: millimetres per stitch or SPI;
- target range, if already validated;
- thread family, size direction and colour;
- needle or penetration restrictions where relevant;
- seam allowance, edge distance and reinforcement;
- visible-face and reverse-face appearance requirements;
- starts, ends, backtacks and repair rules;
- curve, corner and layer-transition criteria;
- required loaded, cyclic, water or other functional tests;
- inspection locations, sample plan and defect classification;
- approved sample and change-control requirements;
- quantity by product, colour and version;
- packaging and delivery requirements.
MOQ, cost, feasibility and timing depend on the full bag specification, materials, operations, equipment, test scope and order quantity. Request current project confirmation.
Make stitch density inspectable
Benshine can review a reference bag, drawing or construction brief and help translate stitch-spacing expectations into measurable sample and production controls. The approved setting should be tied to the exact seam—not presented as a universal rule for every bag.
Review Benshine’s custom bag manufacturing process, explore the factory evidence page, or send your bag specification.
Quick answers
What is the best stitch length for sewing bags?
There is no universal best stitch length. Set a measurable range for each important seam after reviewing the stitch type, material stack, coating, thread, needle, seam function, appearance and required performance. Approve it on the actual assembly rather than applying one number to the whole bag.
What is SPI in bag sewing?
SPI means stitches per inch. It expresses stitch density by counting the stitches or needle intervals over one inch of a straight, representative seam. The specification should state the measurement method, location and treatment of partial stitches.
How do you convert stitch length in millimetres to SPI?
For a simple nominal conversion, SPI is approximately 25.4 divided by millimetres per stitch, and millimetres per stitch is approximately 25.4 divided by SPI. Rounding and real machine variation mean the production range should still be checked directly on the approved seam.
Are shorter stitches always stronger?
No. Shorter spacing creates more penetrations, but excessive perforation can damage or weaken some coated, laminated, tightly woven or film-like materials. Strength depends on the complete material, seam, thread, needle, reinforcement, edge distance and load direction.
Should every seam on a bag use the same stitch length?
Not necessarily. A visible topstitch, zipper installation, bound internal seam, curved pocket, thick webbing transition and programmed reinforcement can require different controls. A seam map should identify the range and inspection method at critical locations.
How should stitch length be checked during bag production?
Measure a defined straight section at a named seam location using an agreed gauge or scale. Avoid starts, ends, tight curves and thickness transitions unless those areas are the inspection target. Record the sample, measurement length, stitch count or spacing, result, defect rule and disposition.